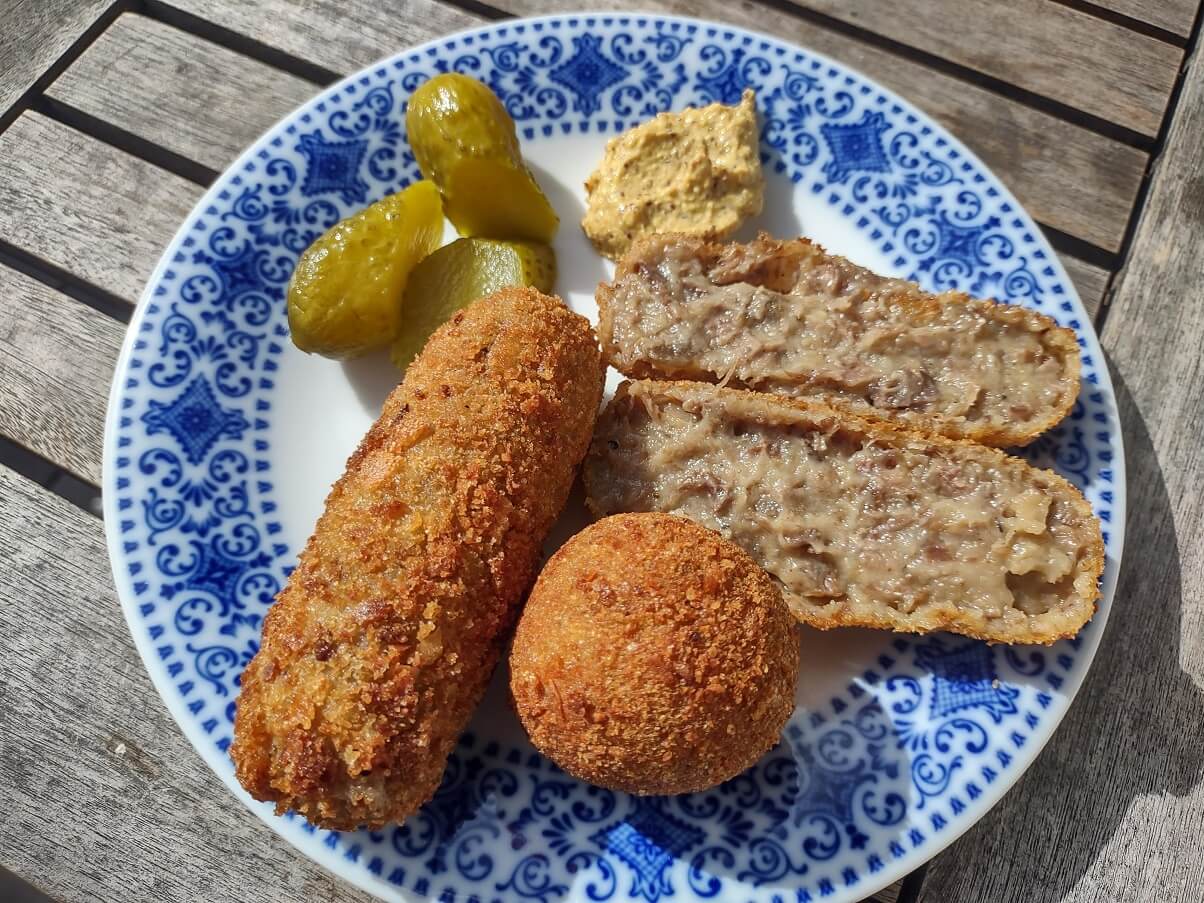
Dutch Croquettes or kroketten are a staple in every café, snack bar, school menu, or even out-of-the-wall. There are a few companies that make them, and there is fierce debate over which one is best. From the veal croquettes that are made from original bakeries, such as Holtkamp and Kwekkeboom. To the butcher’s croquettes from Mora or Beckers.
In this article, I will focus on the recipe and ways to make them yourself at home, without any special equipment or ingredients. So that you can recreate your favorite Dutch food, wherever you are.
What makes Dutch Croquettes Dutch?
There are lots of different croquettes all over the world that are prepared in many different ways, from the Spanish ones you have with a tapas (pinchos) evening, to the ones that are served in France. With pretty much any food type, recipes get changed and adopted over the many years, and many types of cooks prepare them. Croquettes probably made it to the Netherlands from French cuisine.
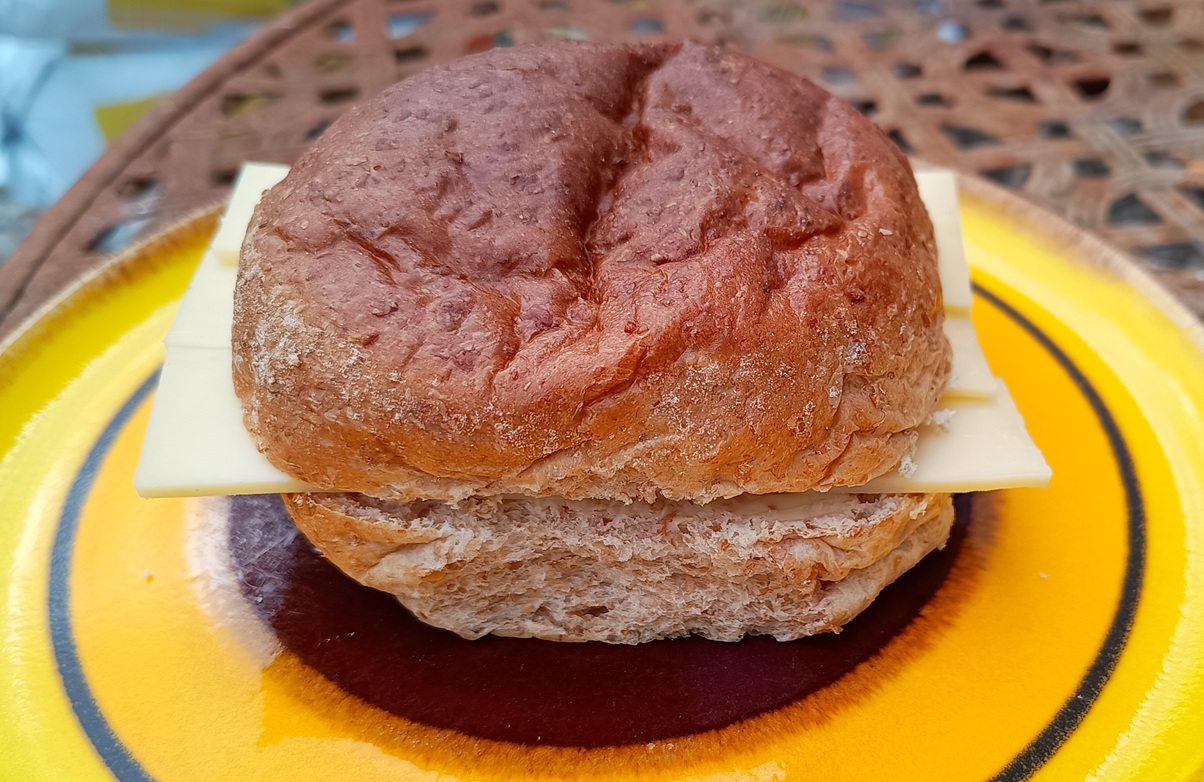
What’s different in Dutch Croquettes is that they are prepared with a roux, and not made with potato as a binder. Rather surprisingly perhaps, for such a potato-eating country. That roux is also made with stock instead of milk, made with butter instead of olive oil, and they are eaten with a healthy amount of mustard. On its own, in a very soft white or brown bread roll in a snack bar (bolletje or kadetje), or on an open-faced “boterham” or slice of bread in any lunchroom.
They are ingrained into Dutch people from the Friday Snackday, or Friday happy hour, where at your work they will get a few kilos of fried stuff to devour. My standard order is always a “patatje oorlog met ui, frikandel speciaal met ui, broodje kroket“. Which translates into an order of fries with peanut sauce, mayonnaise, and raw onion, a long meatball stick with curry sauce, mayonnaise, and raw onion, and a bread roll with a croquet and mustard. Afterward, I always almost nod off at my desk. But the industrial strength espressos help.
Croquettes are also ingrained into our youth, with them being available in school cafeterias, and supermarkets in the form of sausage rolls, but then with a croquet in them. Another great invention. And a popular snack next to the frikandelbroodje. Wash it down with a budget energy drink, and curse a lot with diseases and you have the classic school kid.
Making your own Dutch Croquettes / Kroketten
There are many different types of Dutch Croquettes and different ways of preparing them. After spending a few years experimenting, preparing, and cooking them, it is clear to me that there is no 1 way of going about it. Croquettes are traditionally a way of using up leftovers. You can try making the following different types, in relatively the same way:
- Veal croquettes
- Beef croquettes
- Mushroom and onion croquettes (with care, they can be completely vegan)
- Shrimp croquettes
- Chicken croquettes
- Pork croquettes (ham or other parts)
- Various organ meat croquettes such as kidneys or liver
- Cheese croquettes
The main time-consuming steps in the process are divided into three parts. Making the broth or bouillon (stock), making the roux, and lastly shaping the croquettes. Between those steps is also a wait period, making the stock yourself will take approximately 4 to 12 hours if done the official way. After making the roux you need to let it cool and rest for 8 hours. And after shaping the croquettes for the best results you need to let them rest in the fridge or freezer for 12 hours.
You can cheat here a little, and go for store-bought stock, and cut out the first day of preparing it. The resting period of the roux can also be shortened, but I recommend you let them rest for at least three hours. After shaping the croquettes you can also fry them directly, they will be less firm, however, and spill some more roux in the oil. As well as being less golden brown.
Making the stock
A great stock makes a big difference in the overall flavor of your croquettes, it is however something that requires quite a bit of time to make. Start your broth a day ahead of making the roux, and make it according to your type of meat.
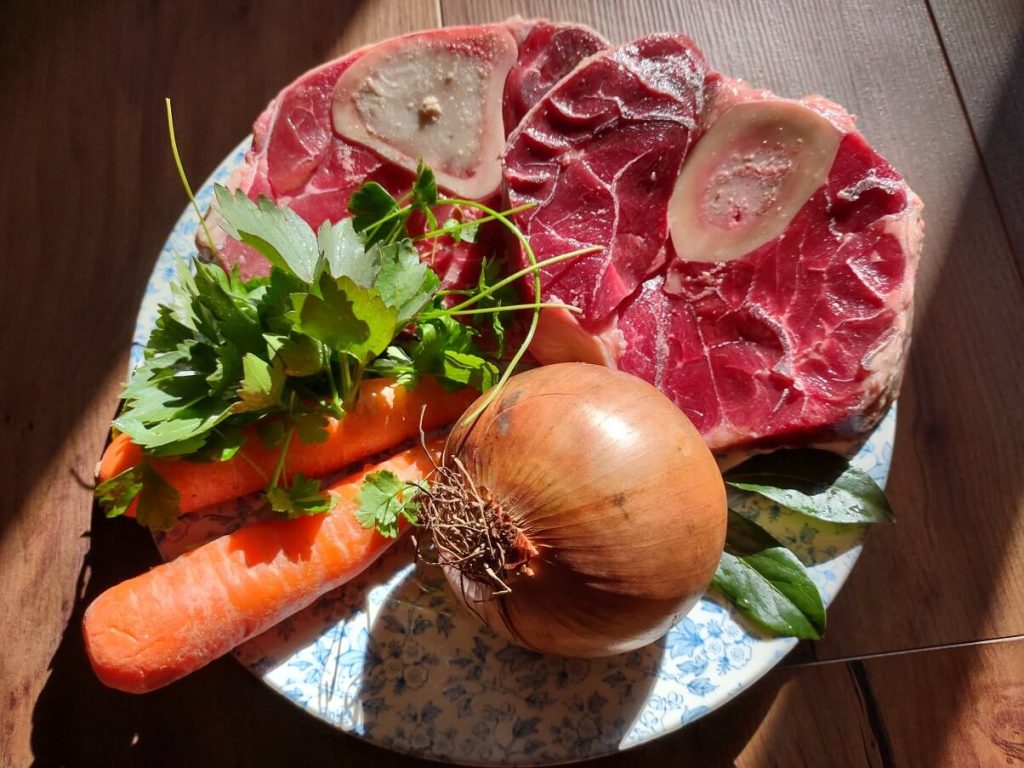
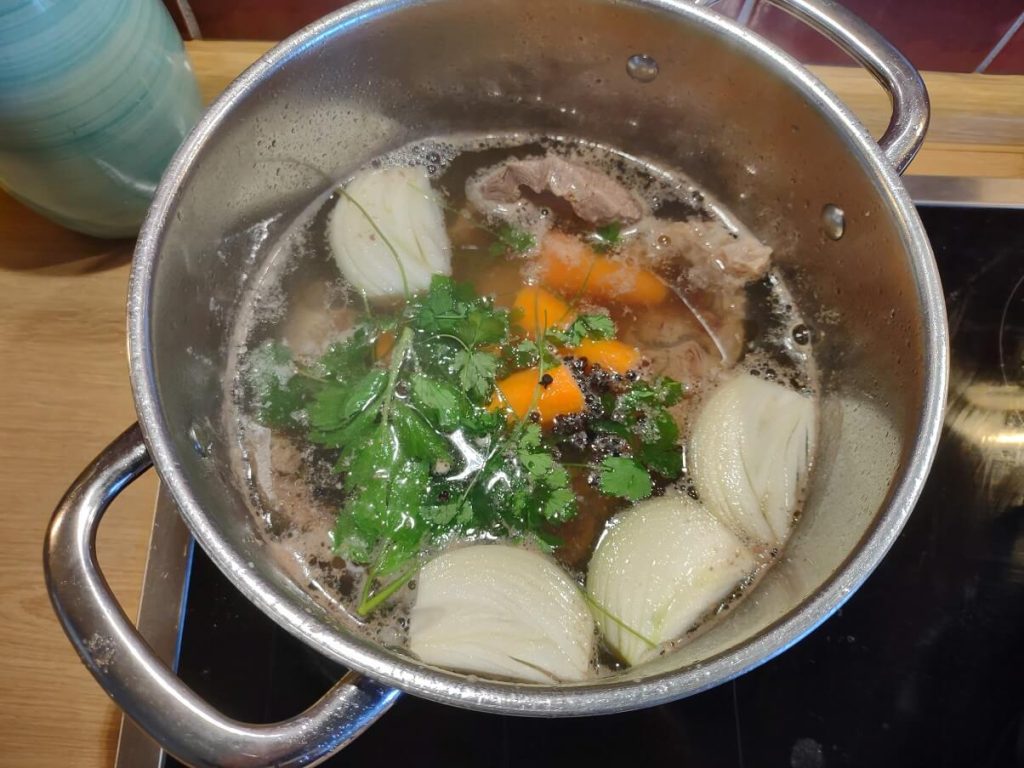
A Beef stock recipe you can use is for example:
- 1 large onion
- 1 big carrot
- 500 grams of beef soup meat, I used two beef leg shanks for the example
- Peppercorns, teaspoon
- Parsley, handful
- Lovage, (Levisticum officinale) couple stalks
- Laurel, one to two leaves
- 1 to 1,5 liters of water
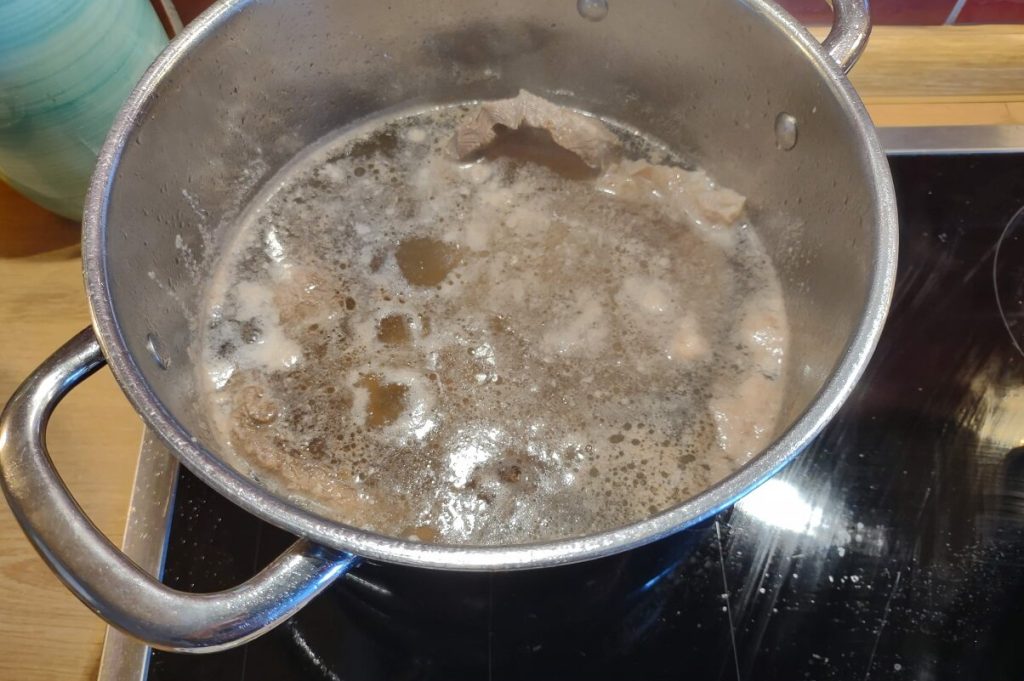
Start with throwing the meat into a 200c oven for 20 minutes, a bit of oil is wise to prevent the meat from sticking, alternatively, you can opt for blanching to remove most of the scum. Meanwhile, clean and chop the vegetables into big chunks. Bruise the peppercorns, and wash the parsley and lovage.
Add 1 liter of water to the pot, together with your meat out of the oven, and bring to a gentle simmer, skim off the stock as needed, and add the rest of your ingredients. Let gently simmer for a few hours with the lid off or crooked. Add a bit more water if needed. 4 hours is considered by many to be the minimum. I usually let it go for at least 6. You can even take it up to 12 hours.
Depending on the type of meat you’re using, this changes. Fish only needs to be simmered for 30 minutes, chicken for about 4 hours.
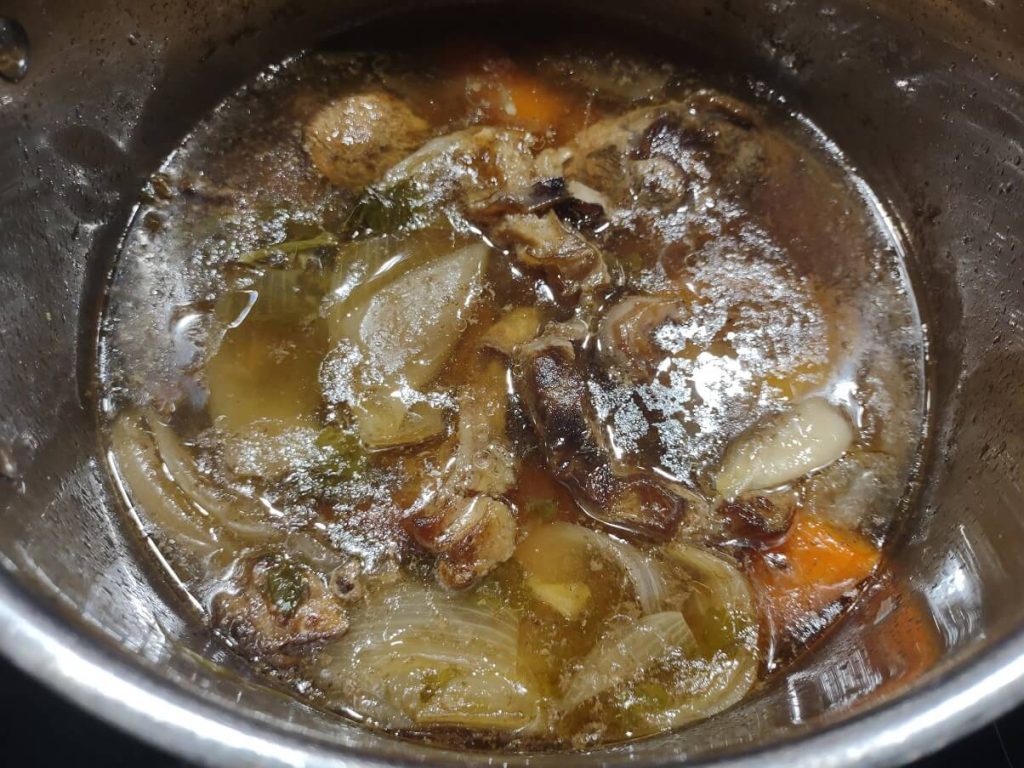
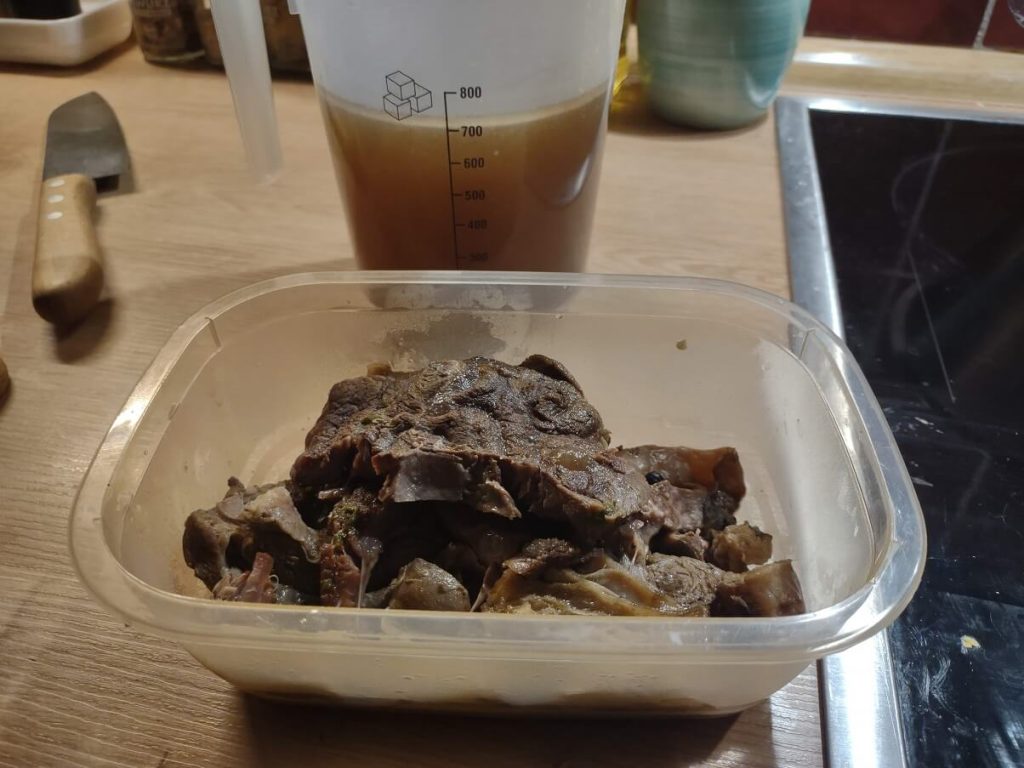
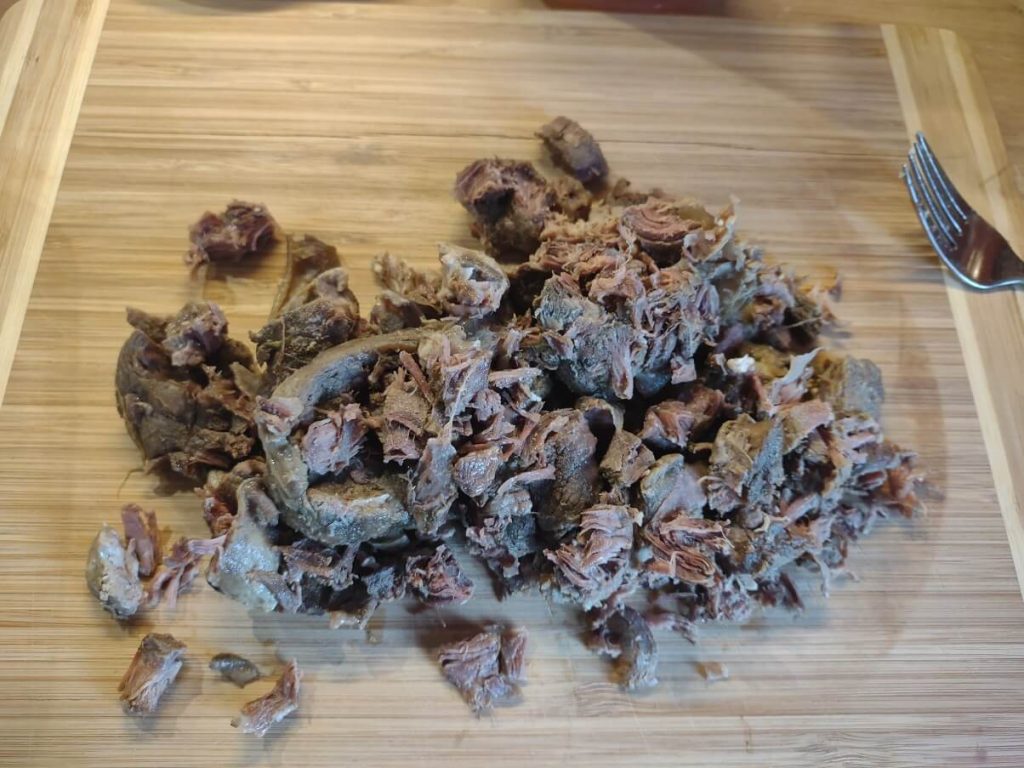
After, pick out the solids of the stock, set aside the meat, and discard the rest. Strain through a fine mesh sieve and set aside to cool. In this example, I set it aside in the fridge overnight.
Store-bought stock or broth
If you want to cheat a bit with making your kroketten, you can do so by buying broth or stock from the store. You will have to cook your meat component then still or get the better quality stock with some meat in it. Alternatively for vegan or vegetarian croquettes, make or buy a vegetarian stock, cook the vegetables separately, and fold them into the roux.
A quick croquet can be made that way by making the roux, store-bought stock, and adding mushrooms or bacon bits to have a croquet ready to eat in just an afternoon.
The Roux
The roux will require some practice and gets better every time you make croquettes, it’s best to make the roux in a pan or pot that does not burn easily. So pick a saucepan with a heavier bottom or even a non-stick frying pan. A silicone or wooden spoon/spatula is best in this case so you can scrape and get into the corners. Burned roux or undercooked Roux will spoil the recipe, or at least make it not as good as it can be. So practice and make sure you pay attention while making it.
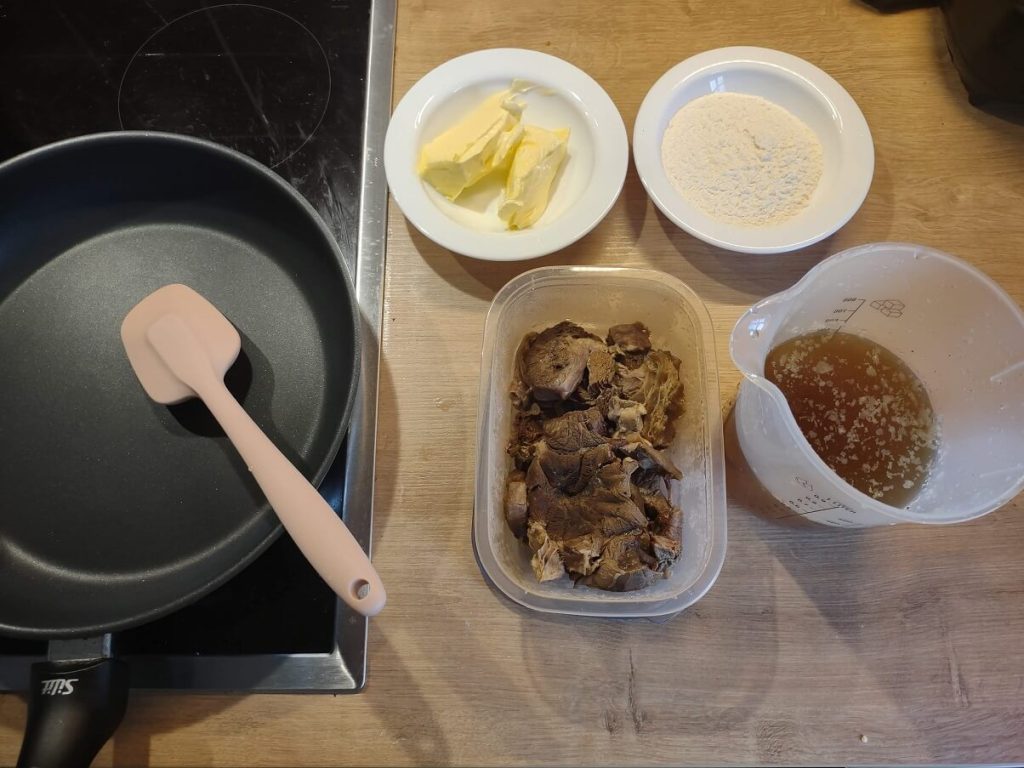
For the Roux you will need the following components:
- Full-fat butter 80 grams
- White flour 70 grams
- Stock or bouillon, 500 milliliters
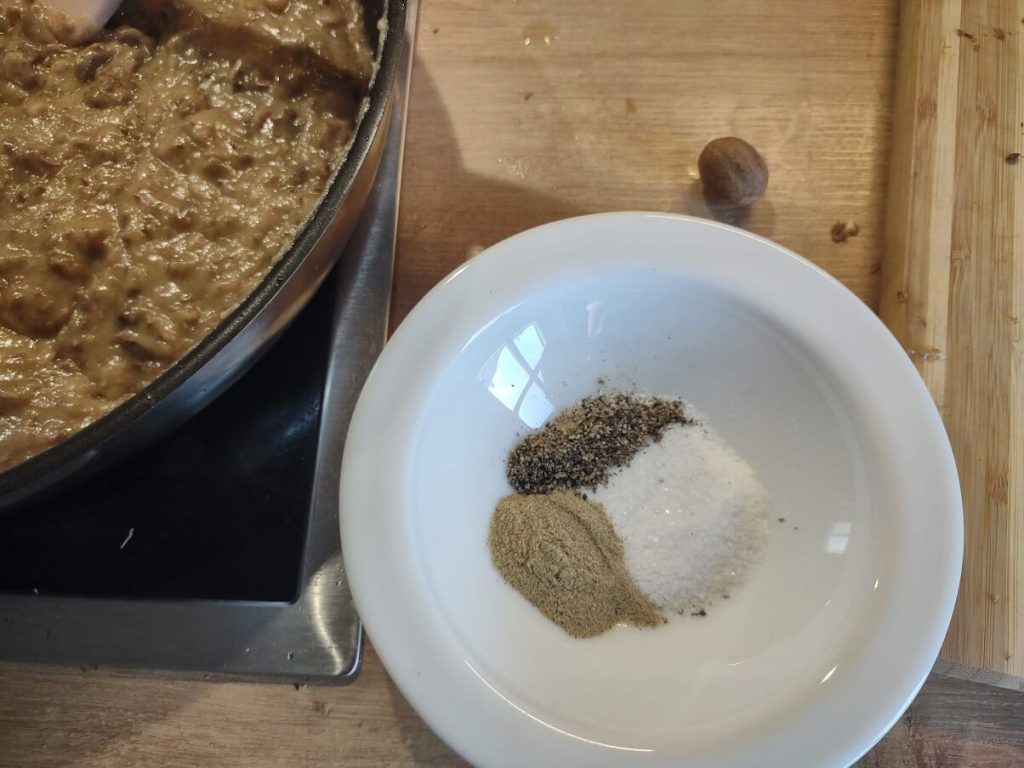
- White pepper, tablespoon
- Black pepper, tablespoon
- nutmeg freshly grated, half a tablespoon
- salt start with a tablespoon and taste from there
- Maggi seasoning (optional)
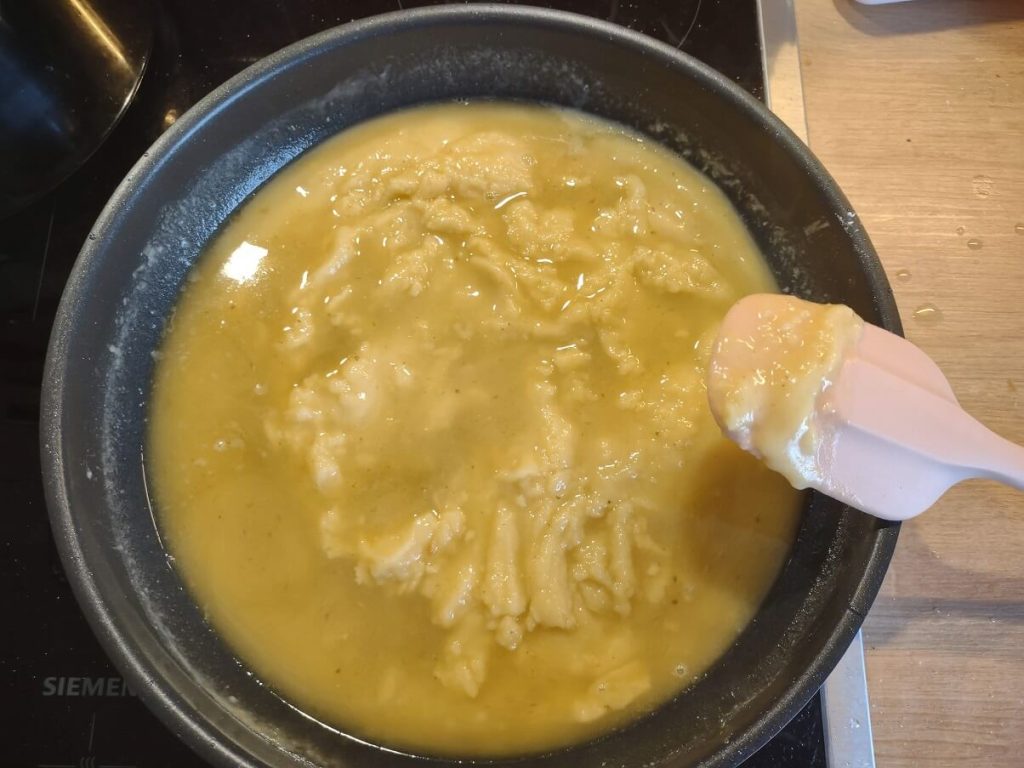
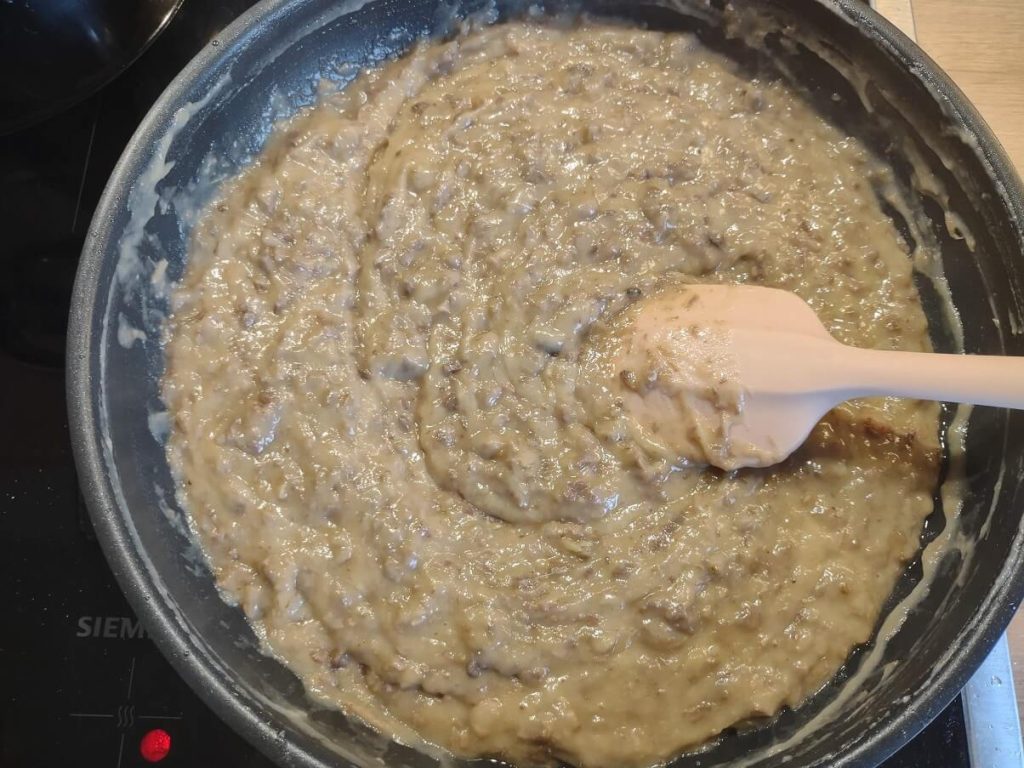
Start with gently melting the butter, and add the flour when the water from the butter has sizzled off. Cook while stirring for ~5 minutes, it should start to smell like cookies, but be careful that you don’t take it too far. Do this whole process in medium to low heat.
Add your stock in big splashes while stirring, and cook it for around 10 minutes, constantly stirring and scraping up the sides until you start to notice that it thickens up. Using cold stock straight from the fridge will result in almost no lumps, and any that form are easily dealt with in the pan.
Add in the finely chopped or shredded meat of your choosing, and gently cook for 5 more minutes. Season with the spices and a little splash of Maggi if you have it. Taste often after for seasoning. At the last moment when off the heat, you can also add in some fresh chopped parsley or chives. For a bit of green in your krokketten, I did not this time.
And then start with the steps:

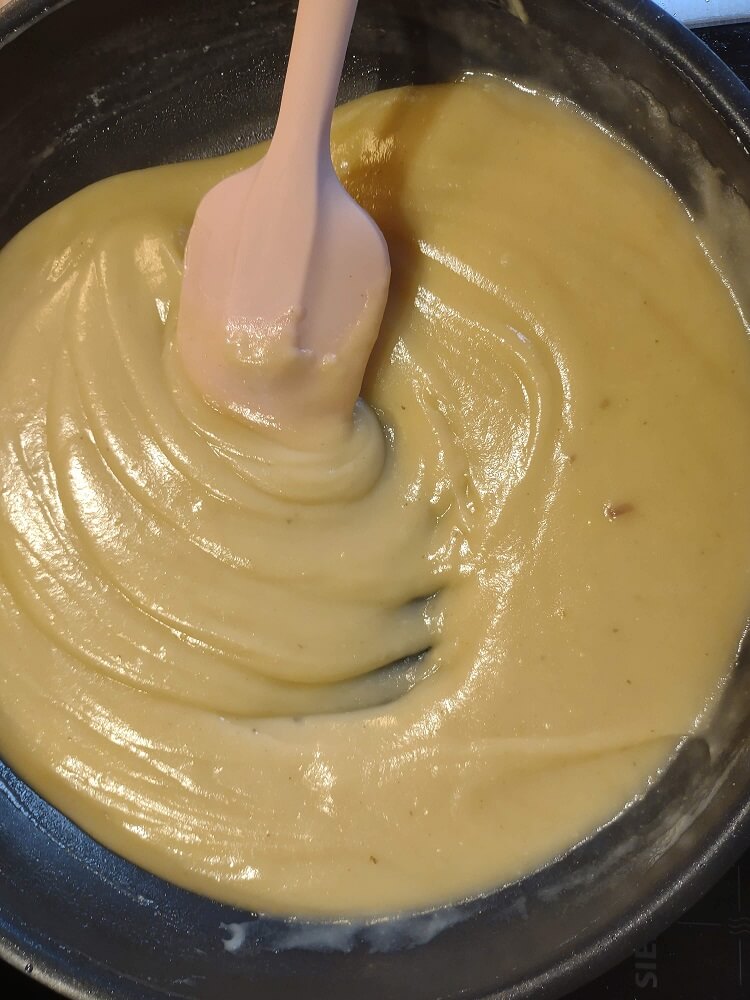
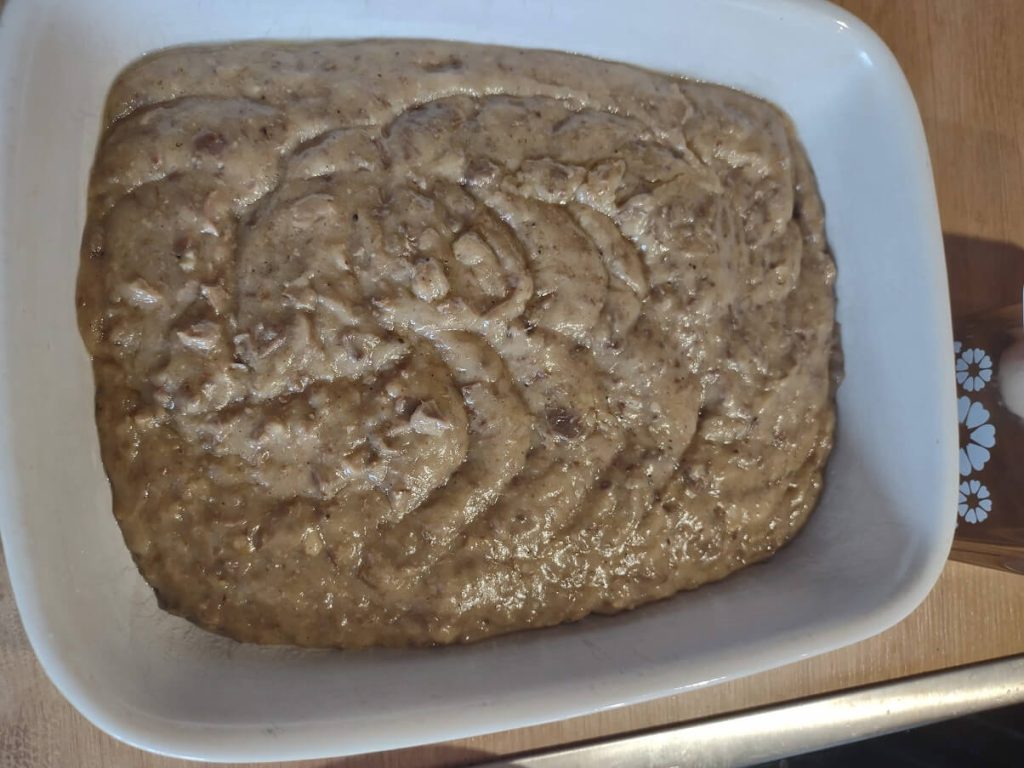
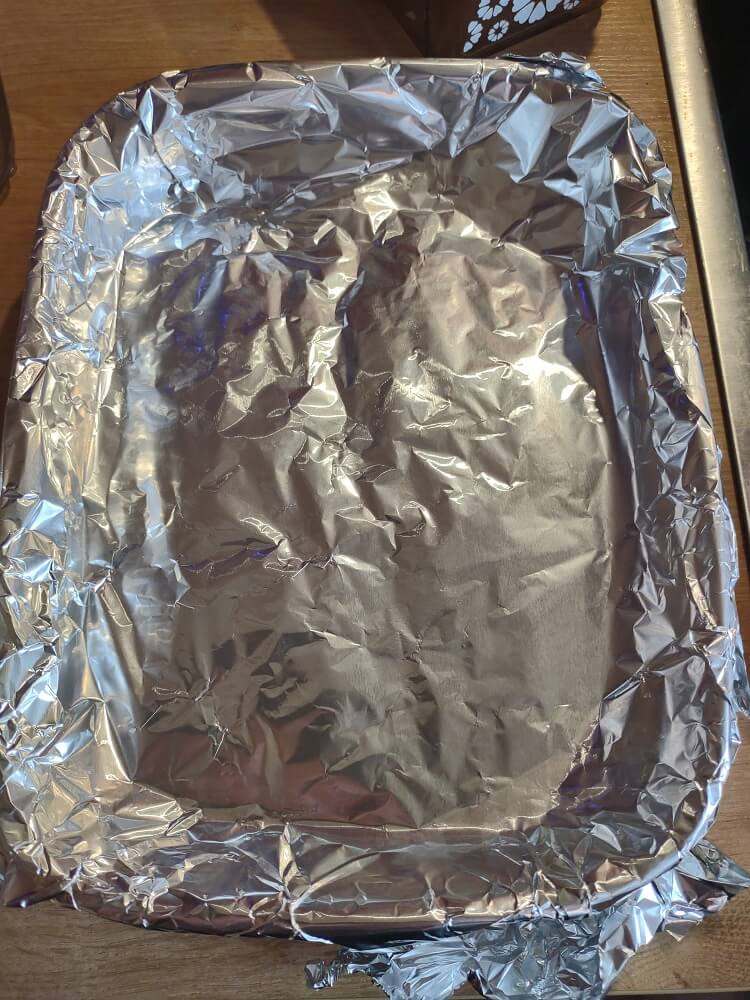
Transfer to a lightly oiled dish and cover with plastic, foil, or paper to the surface of the Roux to prevent forming a skin. Cool overnight in the fridge.
Shaping and breading
The shaping and breading part also gets easier the more you do it, they can be rustic, they are handmade after all.
For the breading, you can make yourself breadcrumbs from any white bread or roll, the German style Kaiser rolls are excellent for this, the same stuff they use for Wiener Schnitzel. Simply grate over a box grater and sieve out the large particles from the bigger particles. Do this on a baking tray from the oven to not make a mess. Optionally you can take regular breadcrumbs from the grocery store and/or panko.
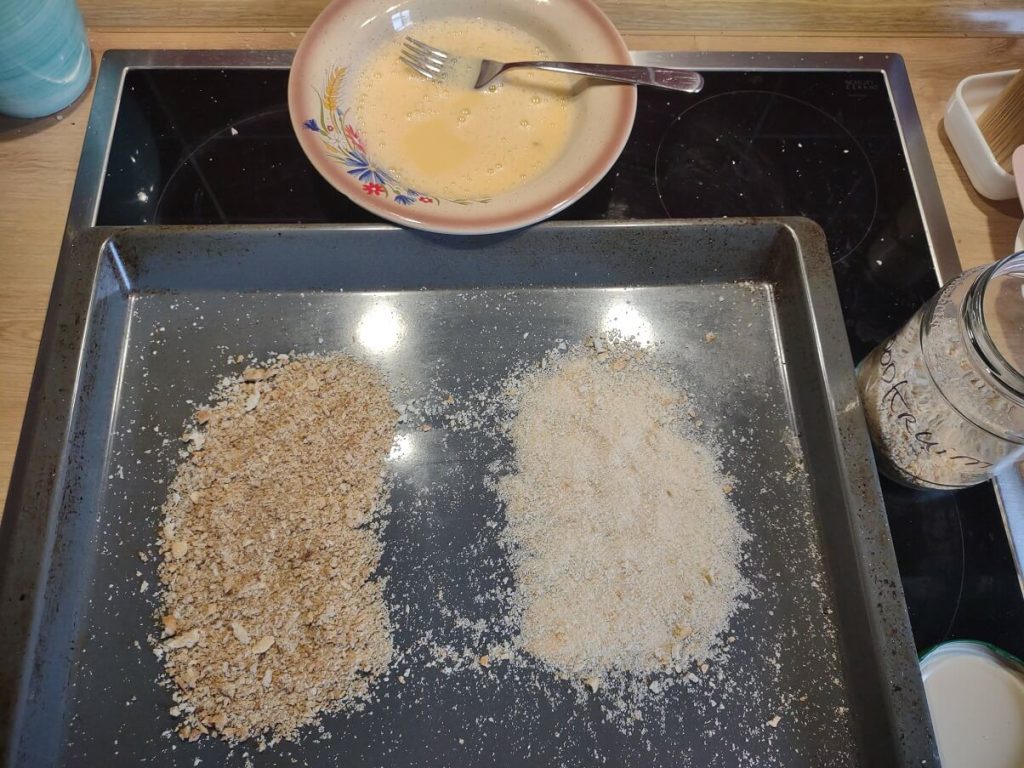
Crack two eggs in a shallow dish, add a splash of water, whisk, and set it next to your breading station.
Take the Roux out of the fridge and spoon out the wanted size, for krokketten you can make them as big as you want to. I tend to make them on the smaller side, so they are a bit easier to handle and fry. Start with a good scoop with a tablespoon and decide from there.
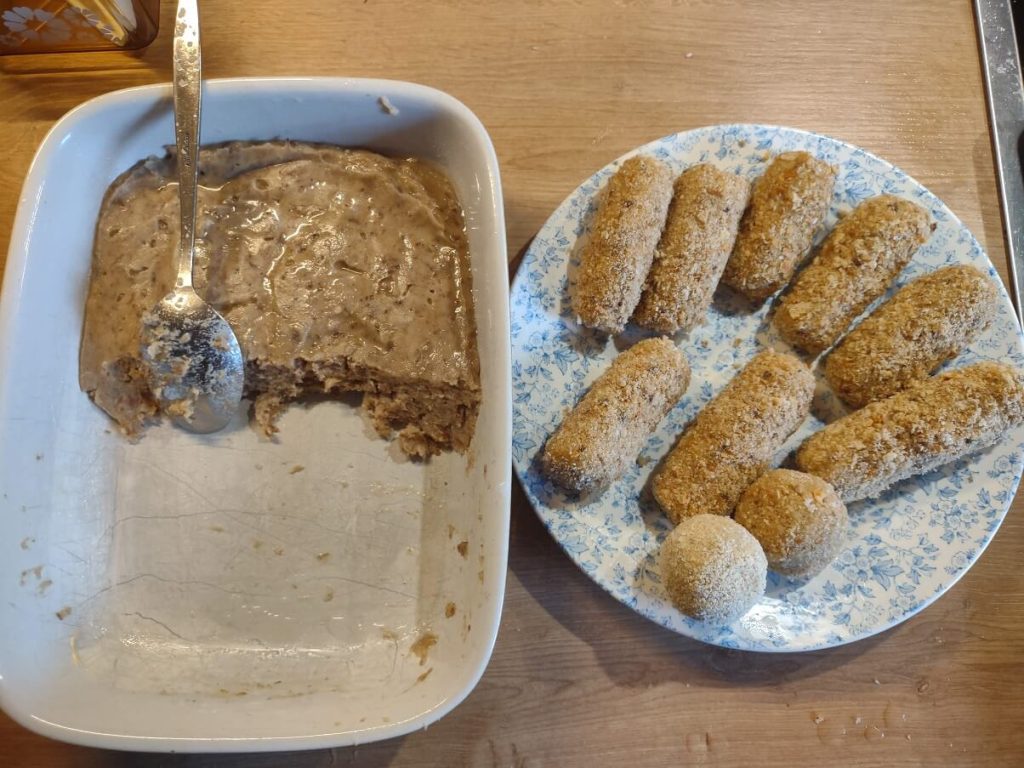
Form into a ball and roll around in the fine breadcrumbs, if you leave them round at this point you have bitterballen, or bitterballs. Otherwise, gently press down and roll with the flat of your hand. To make them as cohesive and log-shaped as possible. Don’t forget to bread the ends. Put it in the shallow dish with your egg and water mixture, and cover it completely. Next, roll them gently around in the coarse breadcrumbs and give them the final corrections for the shape. Transfer to a plate or dish. You can put a little baking paper onto that dish or plate to prevent any sticking.
Take a look at the videos I took of the way I do it, to get the idea:
Once you have finished rolling and shaping all of them you can store them in the fridge for the next day (or at least an hour) or you can freeze them at this point to have croquettes on demand.
Frying
Since I like to make my croquettes on the smaller side, I tend to shallow fry them in some sunflower oil in just a normal small skillet. This doesn’t require me to heat up a whole pot of oil, turn on a deep fryer, or waste a bunch of oil on two croquettes on a Sunday.
Traditionally, they are deep-fried. When deep frying, you can do them straight from the freezer, or defrost them beforehand. I tend to defrost them, as I find they cook a bit faster. With no risk of having still a cold center with a golden brown exterior. Just handle them a bit more gently.
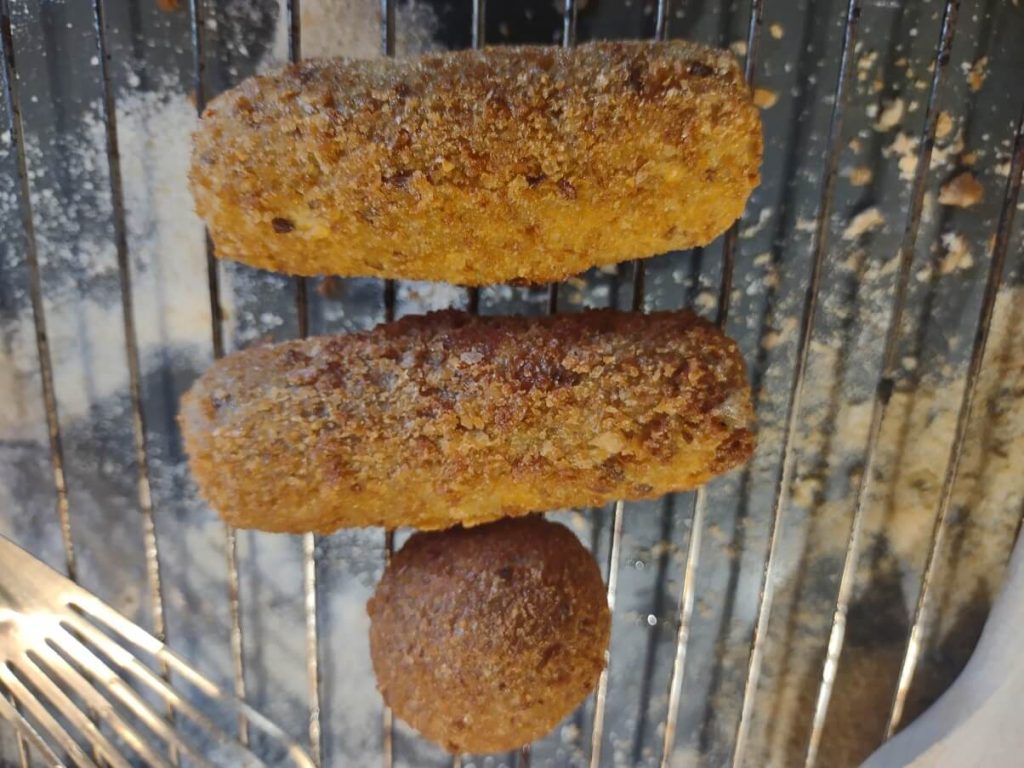
Deep fry them for 3 to 6 minutes, at 180 c, or until golden brown. Drian and rest for a minute on a wire rack, and eat them how you want them.
Final notes
And there you have it, a slice of homemade Dutch cuisine, not even a lot of Dutch people do this themselves anymore in my circles, but instead, buy them from the freezer section. A sad trend in my opinion.
If you still have a recipe from your oma, opa, or a passed-down recipe I would love to hear about it. As I am sure everybody that found this article. Please share it with us in the comments.
Gelatine
What you will find missing in my recipe, which perhaps you saw in others, is the use of gelatine leaves at the end of making the Roux, I choose to omit that since it is not in any of the older recipes that I found. And only shows up in the later recipes. You can choose to include it when you want to make the rolling easier. Just soak them in some cold water, squeeze them out, and stir in at the end. The croquettes also come out glossier with the gelatine.
Vegan / Vegetarian
Since my sister and wife are vegetarian, I make kroketten for special occasions also in a vegetarian form. You can do so by using a Mushroom and onion mixture as the meat replacement, finely chop that and cook that in oil instead of butter. Add in your flour, then when cooked spice to your liking and proceed as usual. To replace the egg in the breading process you can use some aquafaba or a slurry of cornstarch and water.
Sources
I researched a lot of different sources over the years and winged it a bunch of times with various results, all my sources were and are in Dutch. A couple of people need to be mentioned here as a word of thanks, and that is Anton van der Horst, with his book “Van Achterpoot tot Zwezerik” published in 1988. His book is all about eating various organ meats.
Second is Nick Toet, with his YouTube channel Etenmetnick focused on food around the world, but also has an excellent recipe for Duch Croquettes. Also on YouTube is the baker Cees Holtkamp which has his traditional veal kroket down to a science. His rolling technique is the best I found. And last is the trusty Magriet cookbook that has a place in many Dutch kitchens, and also has a recipe for Dutch Croquettes. The 1978 edition I got for free from a neighbor when moving out on my own, has its own place on my bookshelf.
Croquettes are one of those things that take quite a bit of time to make, but the actual active work involved is minimal. With practice, it also becomes easier and faster. And you can take some shortcuts when you are short on time. I would love it if you would give them a go, and be sure to share any final results or questions with me.